18 Oct 2015
A while ago I was observing some HTTP requests fly through Google Chrome Dev Tools’ “Network” tab, when I noticed an interesting HTTP header being sent by the browser for each request – Upgrade-Insecure-Requests: 1.
It turns out that Google Chrome 43 and newer sends this header automatically. The HTTP request header is closely related to the Content-Security-Policy: upgrade-insecure-requests HTTP response header.
The “Upgrade Insecure Requests” Content Security Policy is a W3 specification that can be used to instruct a browser to automatically upgrade any insecure HTTP requests to the secure HTTPS alternative before the browser does any fetching of resources – essentially it solves annoying mixed-content issues you face when a webpage is served over HTTPS. Even if a single image has a src attribute with referencing the HTTP protocol as opposed to the HTTPS protocol, you’ll still get the dreaded mixed content warnings in the browser’s address bar.
It turns out that the browser sends the Upgrade-Insecure-Requests: 1 header to indicate to the server that it supports the “Upgrade Insecure Requests” Content Security Policy, and that it is actually preferred.
Ideally, Content Security Policies should be enabled via an HTTP response header which is served by the web server to the browser. However, in cases where this is not possible (as is the case with GitHub pages for instance), you can use the <meta http-equiv="Content-Security-Policy" content="upgrade-insecure-requests"> tag in your HTML’s <head> as an alternative.
While this header does help solve mixed content issues, it should not be treated as a silver bullet – you can not just set this header and forget about mixed content issues. For one thing, older browsers might ignore this header and you should still try your best to use protocol-relative or HTTPS URLs where you can.
04 Aug 2015

I don’t understand why every sharing plugin or widget I’ve come across needs to be so complicated, load a ton of JavaScript and/or just be downright ugly.
I decided to make my own super simple, no-frills sharing buttons.
The icons are SVGs, so that avoids having another couple round-trips to the server and has the added benefit of playing nice with retina or other hi-DPI displays since they’re vectors. No server-side voodoo, all done in JavaScript. Since to me only Facebook, Twitter and (perhaps) Google+ are the only relevant social networks around, I’ve just limited it to the big three, but you can easily extend it to fit your requirements.
If you want to use this, just make sure to swap out your site’s postamble (that’s the bit at the end) of your site’s <title> tag and substitute your Twitter username. You can also run it through a minifier to compress it further if you like.
25 Jul 2015
Google Firing Range is a “test bed for web application security scanners, providing synthetic, wide coverage for an array of vulnerabilities”. It’s available on GitHub and also has a publicly available instance on Google AppEngine.
The testbed itself is great, but the project’s README mention’s nothing on how to install it, nor could I find any instructions on other sites. So just in case it will prove useful to you, here’s a short guide and a shell script (I’ve only tested it on Ubuntu 14.04 LTS)
Pre-requisites
Before you start, you need to install the Java JRE/JDK. If you need help getting that installed, head over to this neat article by Digital Ocean.
You’ll also need to install Apache Ant. Apache Ant is a tool that is used for automating software builds.
sudo apt-get install ant
Download Firing Range and its depencancies
Once you have the Java JRE/JDK installed, clone the Git repository to a directory on your computer.
git clone https://github.com/google/firing-range.git
Since Firing Range is meant to run on Google App Engine, you’ll need to download and unzip the Google App Engine SDK for Java in order to run it.
Next you’ll need to set the path to the SDK in build.xml. Open up the file in your favourite editor.
nano firing-range/build.xml
Find the following line and change the location of the SDK to where ever you placed it on your computer.
<property name="appengine.sdk" location="../.."/>
Next, we’ll need to compile the project using Apache Ant. This will create a war directory which will contain the compiled application.
ant compile
That’s it! Now we just need to run the built-in server bundled with the Google App Engine SDK.
appengine-java-sdk-1.9.23/bindev_appserver.sh firing-range/war
You can also choose to change the address and port the server binds to. In the below example I’ve changed the binging of the web server to bind on all interfaces on port 8080.
appengine-java-sdk-1.9.23/bindev_appserver.sh --address=0.0.0.0 --port=8080 firing-range/war
Shell script
Here’s a shell script to do this automatically (tested on Ubuntu 14.04 LTS)
16 May 2013
John the Ripper (John for short) is an open source, multi-platform, best-of-breed password cracking tool – primarily, because it’s fast, versatile and highly customisable. John not only supports a wide variety of hashes, but also is able to accept a variety of customised rules and parameters.
Unfortunately however, John doesn’t leverage the multicore CPU you have in your machine, since it is, by default, singlethreaded. As such, if you own a CPU that supports multithreading, John will probably end up run slower since it would only be working with an approximate maximum of half of the total CPU capacity of a single core.
Fortunately, John can be made to run on multiple cores with multiple threads with OpenMPI. Yes, I am aware that this subject has been covered before, however, since I haven’t found anything online about setting this up from start to finish on a Mac running OS X 10.8 (Mountain Lion) I’m going to cover just that.
Note — You should be able to follow pretty much the same procedure in Linux. It’s actually easier to set-up in Linux since the GCC compiler and OpenMPI might be installed already (they are if you are using BackTrack or Kali).
Approach
We’ll need to install Apple’s Xcode, download the latest versions of both OpenMPI and John, enable a few flags, and compile OpenMPI and John from source. After we compile John, we’ll also be taking a brief look at another configuration we can use to enable John to compete for CPU time an not only make use of idle CPU cycles. Let’s jump right in!
Step 1 – Downloading Xcode
We’ll start off by downloading Apple’s Xcode. We’ll need Xcode in order to be able to install the GCC compiler out of the box. I’m sure you can install GCC without installing Xcode (it’s probably not that difficult) but for simplicity’s sake, we’ll be going with Xcode.
In order to download Xcode, you’ll want to head over to the Mac App Store. On older versions of OS X, you can probably find a DMG file somewhere and install Xcode from there (you might run into some incompatibilities if you do this on older Macs).
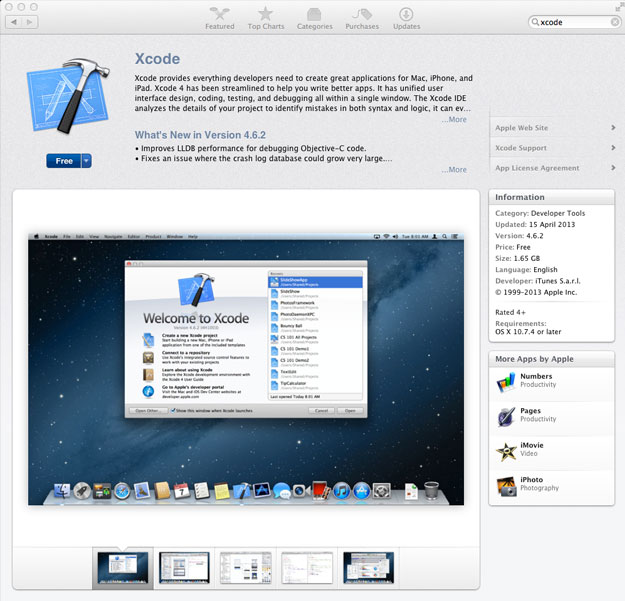
Once Xcode is downloaded and installed, go ahead and start it up. You should be greeted with a splash screen saying ‘Welcome to Xcode’. Navigate to Xcode > Preferences in the top menu, or the usual ⌘, for shortcut fans. In the Preferences window, navigate to the Downloads tab. There you should be able to download and install the Command Line Tools from within Xcode. Go ahead and click Install.
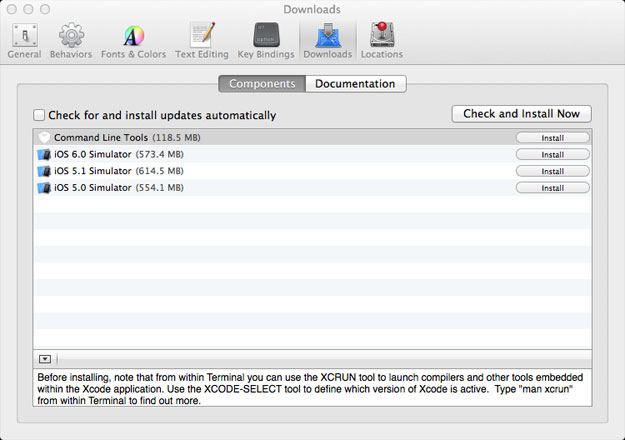
If you try to run the make command before we install Xcode and its Developer Command Line Tools you will get a make: command not found error. The make command invokes the compiler, and based on the Makefile (more on this later) the compiler will compile the source code into executable files.
Step 3 – Compiling and Installing OpenMPI from source
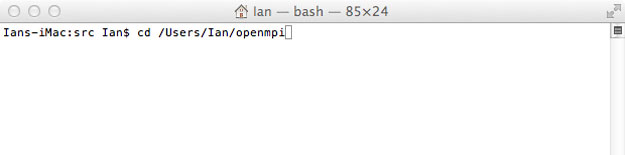
Now that we’ve got all the Command Line Tools installed, let’s compile and install OpenMPI. As far as I know you can’t download a binary version of OpenMPI the Mac. Compiling it from source is not too hard anyway. Download the OpenMPI source from here to get started. If you’re confused as to which file to download, go with the first one – it’s the latest version. Place the folder somewhere predictable. I placed it in my home directory and renamed it to openmpi make things simpler.
If you haven’t yet fired up your Terminal, now’s the time to do so. cd into the directory with all the source code.
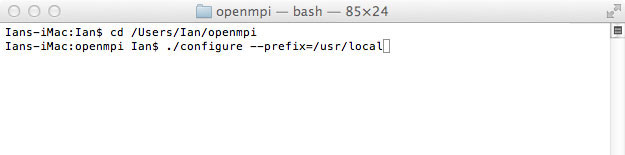
Next, you’ll need to run ./configure --prefix=/usr/local . This will run a configuration application that will configure OpenMPI before actually compiling it. We’ll be using the /usr/local folder to host the OpenMPI installation.
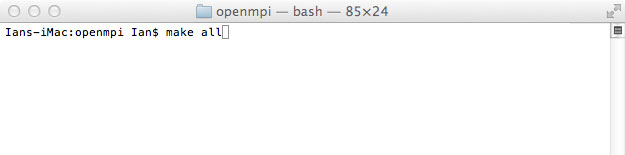
Once OpenMPI is configured, you now need to run the make all command.
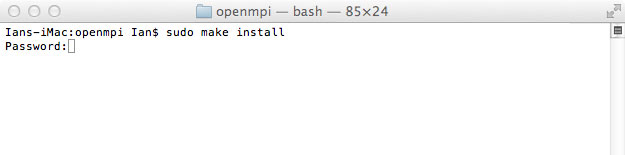
Finally, Install OpenMPI by running the sudo make install command. We’ll need sudo since we need administrative privileges to install applications. You will be prompted for your password, which won’t show up as you type it – that’s okay, just hit the return key when you’re done.
That’s it! OpenMPI should be successfully installed. You should be able to see new folders in your /usr/local folder. You can take a look at this directory in your Finder. If you haven’t installed anything except OpenMPI it should look similar to the screenshot hereunder.

Step 4 – Compiling and Installing John the Ripper from source
While OpenMPI took a little while to set up, it will be worth wile once we compile John, especially if you’re sporting a fast CPU on your machine!
Before we start to compile John, you need the latest Jumbo package. A Jumbo package is a community-enhanced package that implements some of the latest enhancements and tweaks from the John the Ripper community. Make sure you download the UNIX version and not the Windows version (in this case at least).
Unpack the archive file in which ever way suits you best. Once again, place the folder somewhere predictable. I placed it in my home directory and renamed it to jtr make things simpler.
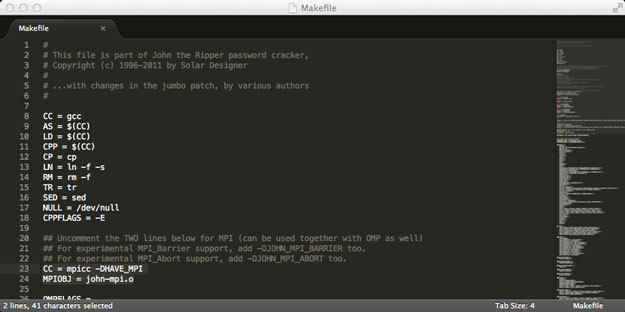
Before we fire-up the terminal, we need to make some tweaks to the Makefile in our src directory (the Makefile is simply a file that tells the compiler how to build the program). For this we’ll need to have a good text-editor (you can use TextEdit if you like. But this should serve as an excuse to get your hands on a good text editor). If you like to work in the terminal, you can use nano, vi and the like. I’m using my favourite – SublimeText.
You’ll want to un-comment (remove the ‘#’ symbol at the front of the line) the two lines as follows (line numbers 23 and 24 at the time of writing) to enable OpenMPI in John.
#CC =  mpicc -DHAVE*MPI
#MPIOBJ = john-mpi.o
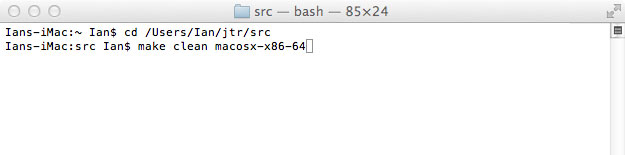
We are now set to compile John. Simply fire-up a Terminal window and cd into the directory you placed John’s source and simply run make clean macosx-x86-64 to compile John.
Step 5 – Additional configuration
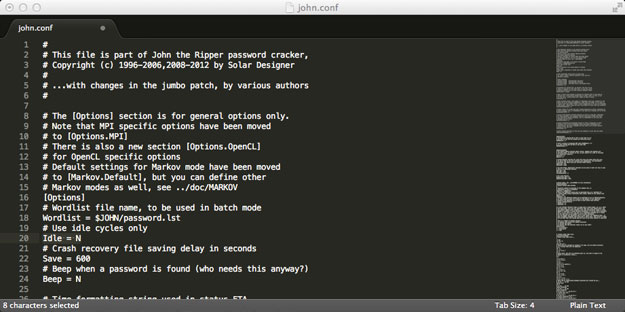
By default, John does not compete for CPU cycles, but makes use of idle CPU cycles. Allowing John to compete for a share of the CPU speeds things up. While you can opt not to do this if you want to run John in the background, it’s recommended if you’re concerned about speed. In order to make changes to this configuration, from the newly compiled run directory, load john.conf into your text editor and uncomment the following line (currently line number 20 at the time of writing).
Step 6 – Running John
Let’s crack some passwords! First off, you’ll need a password list. If you don’t have one, just hash a few strings of characters using whatever hashing algorithm you like and throw it into a text file. hashes need to be one-per line.
Simply cd into the run directory and start the command with mpirun -np 8. 8, being the number of cores you want john to run on. You’ll need to append this with the actual command for John. So you can have something similar to the command hereunder, which will run 4 instances of John. Make sure you don’t omit the ./ in the command, or otherwise you’ll get an error thrown your way.
mpirun -np 4 ./john --wordlist --rules --format=raw-md5 /Users/Ian/sample-passwords.txt
Note – The example given above is a simple one – always make use of better dictionaries and rules than the defaults John comes bundled with.
That ought to wrap things up. I feel obliged to say this – It’s up to you how use password cracking tools, just do so responsibly and ethically.